one of my old tutorials...
---------------------------------
~Sig scan bar Tutorial~
1. Open up the signature you want to apply the "scanbar" to.
2. Now select the rectangulare maque tool and make a long narrow (horizontal) box on the signature on its own layer. Make it much longer than the signature is high.

3. Now go to edit>fill make sure it is the forground color and click ok.(forground can be any color)

4. Now change the opacity of the layer from 45 to 55.
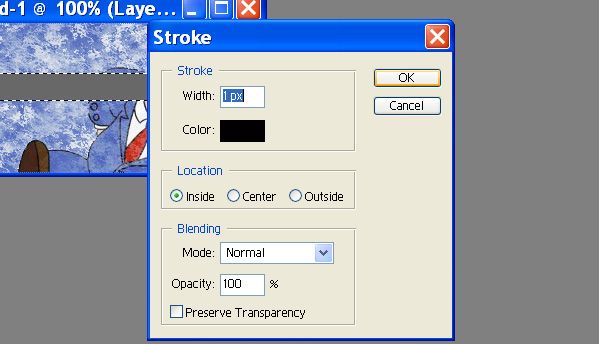
5. Now select edit>stroke and ok (with the settings below).any color will work.
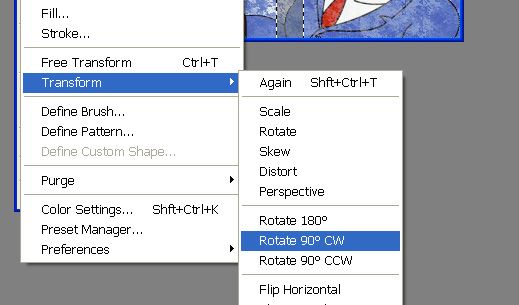
6. Now go to edit>transform>rotate 90 degees CW.
5. Now goto select>deselect or just press ctrl+D. and press and hold shift and drag the scan bar off the sig to the left and be sure to let go of teh mouse button before you let go of shift.
6. Now hit the little button at the bottom of your tool bar called "jump to image ready"

7. Now if you dont already have your animation window out do so by going to window>animation.
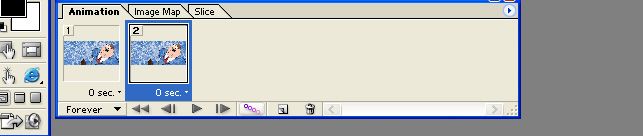
8. Duplicate the furent layer by hitting teh little square button at the bottom of the animation bar. (see image)

9. Make sure the layer with your scan bar on it is selected, press and hold shift and bring the bar all the way to the right side.(the oposite of step 5)
10. A box will come up, put in the settings below (or experiment with the number of frames for different size sigs)

11. Press play and admire your work. Then goto file>save optimized as and call it what you want.
---get it hosted, paste the link into your sig and tada! you have an animated sig like this.

~Tutorial By: Stubean15~


