|
Crysala
|
Post subject: Haunted Mine  Posted: Posted: August 28th, 2006, 3:10 am |
|
Joined: February 16th, 2005, 5:17 am
Posts: 3871
Location: Australia does not pwns you all irl k?
RS Name: Crysala
RS Status: P2P
|
|
Haunted Mine
Background: A great terror has come over the mines of Mort Myre Swamp and they are now believed to be haunted, Zealot has been given the task of bringing back the power of Saradomin to this haunted area, you’re going to help.
Required Skills: Level 15 Agility, Level 35 Crafting, and the ability to defeat a level 95 Enemy
Required Items: Chisel, Food (for defeating the enemy), Prayer or Attack Potions if needed
Quest Difficulty: Hard
Start Point: Speak to Zealot in the Mort Myre Swamp Mines. If you haven’t done the Nature Spirit Quest already you’ll need to speak to Drezel before you’ll be allowed through the gate that blocks the entrance to the swamps. You don’t have to have completed the quest though.
Reward: 22,000 Strength Exp, A Salve Crystal Shard to use to make a Salve amulet, 2 Quest points
1. You need to talk to Zealot, the man in the brown robes with the Saradomin symbol on them and tell him you follow the path of Saradomin.
2. Talk to him a bit and ask about the mines and the great evil that lurks in the swamps. After some rambling the option to ask to borrow a key to enter the mines will come up, choose this and try to convince him to let you borrow it. He will answer no.
3. After you have finished speaking with him you would have started the quest. You now need to pickpocket Zealot to get a small silvery key which will allow you access to the mines.

4. Keep going south a bit and you will see one cave opening that gives you the option to “Walk down stairs”, this is not the entrance we want. Go a bit further south and follow the cart tracks and you should see a cart that gives you the option to climb over it. Climb over the cart then enter the cave entrance next to this.

5. Once inside the mine entrance head west along the cart track until you come to another cart tunnel, climb through this.
6. You will now be outside near a river, keep following the track around the bend until you get to the other cart tunnel, go through this too.

7. You will be inside another cave now, follow the passageway east until you come to another ladder. The passageway is a dead end and there’s only one ladder so you can’t get it wrong. Go down this.
8. Yet another cave you will find yourself in now. Walk East until you come to the first ladder, go down this ladder.
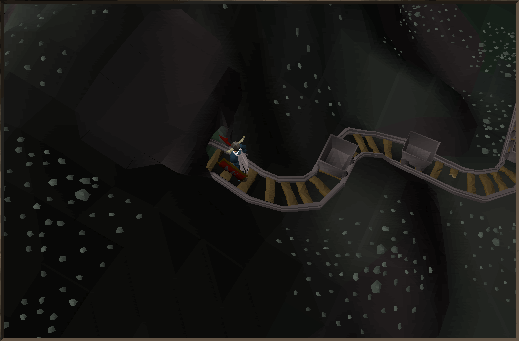
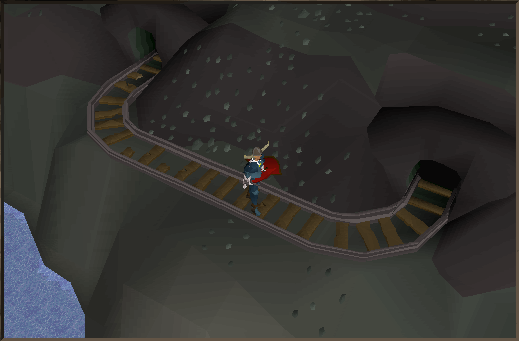
9. You will be in another cave; this time inhabited by haunted mine carts. The moving yellow dots on your mini-map are the carts. You will need to follow the cart track south until the end to find the last ladder that you must go down. Be careful when doing this because if the carts hit you, you will take damage. It’s a good idea to have run on for this part and use the “safe-spots” that can be found along the tracks.
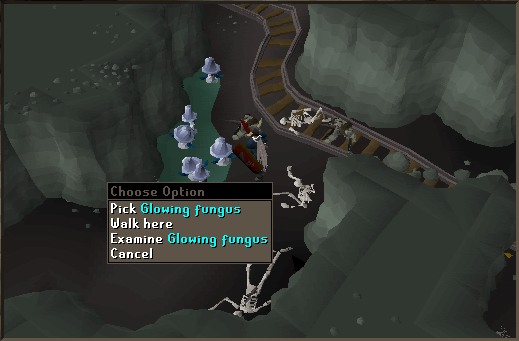
10. You’re in a different cave now. Make your way north along the path and when you pass some Glowing Fungus, pick one.

11. Keep going North-West until you find a mine cart that has a search option, use the Glowing Fungus with the mine cart.
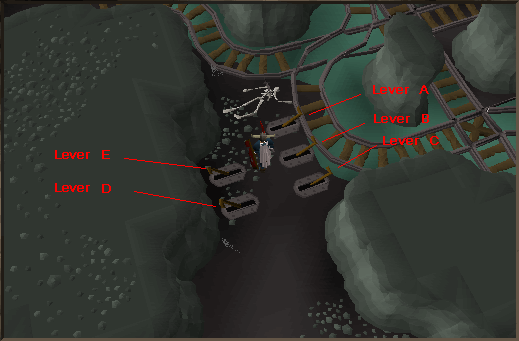
12. Go North-East now and when you get to the end of the path you should see 5 levers. Examine each one and you will find they have letters, A, B, C, D, and E.

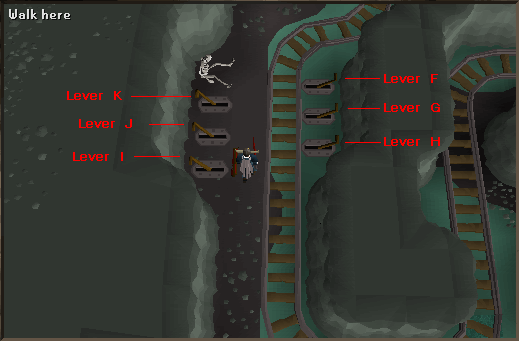
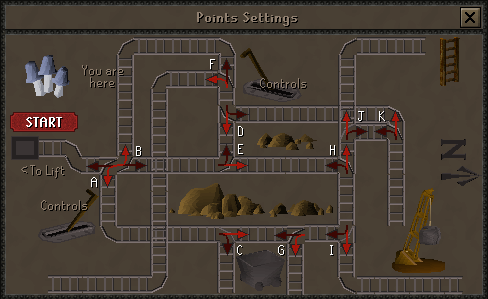
13. Head back to where you placed the Fungus in the mine cart and then head north past the cart and turn left until you come to the Point Settings Board, here is where you can check what all you’re levers have made the cart do. Go left past the board and follow the path until you come to another set of 6 levers. If you examine these levers they will be levers F, G, H, I, J, and K.

14. Go back to the Point Setting Board now and make sure the arrows looks like the image below. If everything is correct click “Start”. If you fail the first time, just go back and put another Fungus into the cart from before and try again, you fail once your cart sinks. The levers that you need to pull to get the cart to move along the right tracks will be different for every player so putting what levers worked for me wont help here. As long as the arrows match up with the image below the cart should go to where it’s supposed to, the large ladder on the right side of the Point Settings Board. Best to just keep trying until you get it right; it’s the most annoying part of the quest.

15. The cart should now be “somewhere more useful”. You’ll want to backtrack now and head back to the first level of the cave from the start.
16. Once you get back to the first level of the cave there is another ladder just before the second cart tunnel that you must go out to get to the third cart tunnel by the river. Go down this ladder.
17. Head north now until you see another ladder by two large doors, go down this ladder.
18. Now follow the track west for a bit until it turns south, you want to go north now until you get to another ladder, go down it.
19. Once down the ladder you should see the mine cart that you placed the fungus in before. Search the cart to get the fungus and then head back up the ladder.
20. Go back East along the cart track that you came along just before and keep following it past the other ladder and around the corner and South. There’s another Haunted Mine Cart here so be careful you don’t get hit by it. Go down the ladder at the end of this path.
21. You’ll be in a new area now, walk south until you see a Water Valve. Make sure to check you have 80% or more energy left because you will have to run for this next section of the quest, when you do use Zealots Key that you pick-pocketed from him earlier on the Water Valve. Run around to the lift on the other side of the water pipe and get it to take you down. Once you do this you will be in a water-filled chamber and will swim to shore.
22. Once out of the water, walk east and go down the stairs that you will come to. This is where the final danger lies so be ready.
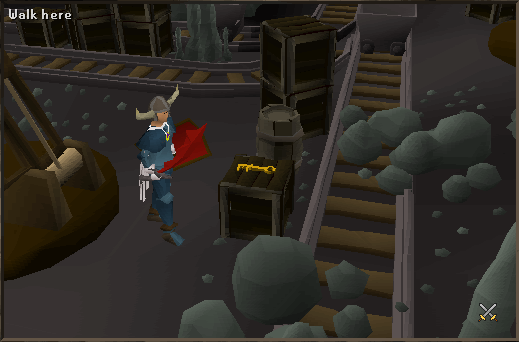
23. You’re in yet another new area now, walk west and go through the door. In the middle of this room there will be an “Innocent Looking Key”, take it and you will then be attacked.

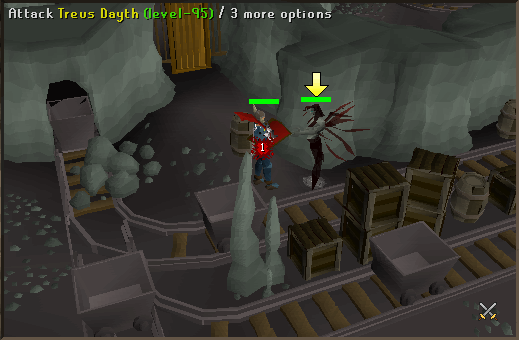
24. The machinery in the room will come alive and a large ghost will appear. There will be axes thrown at you continuously while you’re trying to kill the ghost so it’s a good idea to have protect from missiles on to reduce the damage. Prayer pots are also a good idea if you plan on using a lot of prayer to do the job. Anything less than a full inventory of sharks and you won’t last very long especially if you have a low defence level and no prayer points left.
25. Once you’ve killed the ghost everything will stop and you will be safe. Pick up the “Innocent Looking Key” again and it won’t resist this time. Go back out the East door you came in and back up the stairs. Then walk west until you come to some more stairs, go down these.
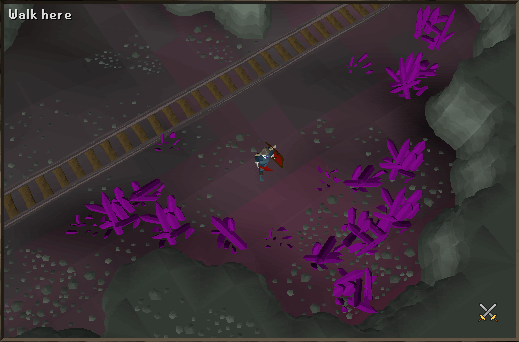
26. Once down here, walk East then South and go through the large door. Use the “Innocent Looking Key” which has now become the “Crystal-Mine Key” with the large door and you will go through. Walk South-East until you see some Crystal Outcrops, use you’re chisel with one of these.

27. QUEST COMPLETE!

Note: In case you’re wondering how to get out of the caves again, you will need to go back to where the lift was and go to the very edge of the steps directly opposite the lift and then “go up lift” and you will be lifted to the above level again. Then just back track your steps. Alternatively you could use teleport runes.
Also, using a ball of wool with the Salve Crystal will make it into a Salve Amulet which can be useful for killing the undead (zombies, etc.).
Written by Crysala, for use by RSBANDB only.
Last edited by Crysala on August 31st, 2006, 4:33 am, edited 2 times in total.
|
|


